How Do You Anodize Metal at Home?

Anodizing metal at home can be a fascinating project for anyone interested in metalwork or DIY improvements. This process is popular because it adds a layer of vibrant color and strengthens the metal’s resistance to wear and corrosion. With some essential tools and patience, you can turn dull metal into a striking, durable, eye-catching piece. But how do you anodize metals, and what’s involved in doing it yourself? In this guide, we’ll cover everything you need to get started with anodizing. You’ll learn how anodizing works, its effectiveness, and the steps to create this finish at home.
What Is Anodizing?
Anodizing is a surface treatment process that changes the surface of certain metals like aluminum to make them stronger, more durable, and resistant to wear and corrosion. It works by creating a protective oxide layer on the metal’s surface. Unlike painting or coating, anodizing doesn’t just sit on top. Instead, it bonds with the metal, giving it a harder, more resilient finish that lasts much longer.
Anodizing usually involves submerging the metal in an acidic solution and running an electric current through it. This reaction causes the surface of the metal to oxidize, but in a controlled way that strengthens rather than weakens it. This oxide layer is what protects the metal from elements that would typically cause wear or damage. What’s also great is that anodizing allows you to add vibrant colors to the metal. The oxide layer is naturally porous, which means it can hold dyes, giving you various anodizing color options. After coloring, the metal gets sealed to lock in the color and make it even tougher.
How Do You Anodize Metal at Home?
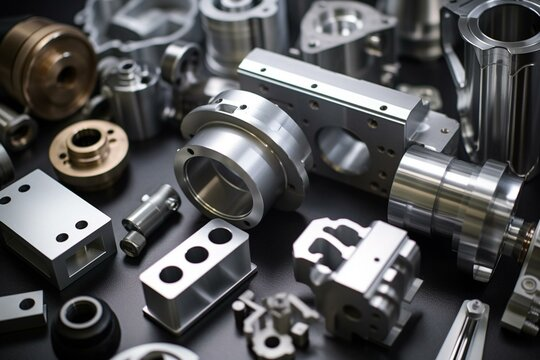
anodized aluminum parts with different colors
Anodizing metal at home is a rewarding process that can transform plain metal into something durable, vibrant, and professional-looking. While anodizing is often done in industrial settings, it is possible to do it yourself at home with the right materials and setup. It requires a few basic tools, chemical solutions, and a careful approach. Once you have these in place, the results can be truly impressive, giving your metal projects a unique, polished look that can’t be achieved with regular paint or coating.
Here’s a step-by-step guide to get you started:
Gather Your Supplies
Before you start, make sure you have everything you’ll need. This includes the following:
- Aluminum parts: Not every metal works well for anodizing. Aluminum is ideal because it responds best to the process, creating a strong, colorful finish.
- Power source: You’ll need a steady 12-volt DC power source, like a car battery or battery charger.
- Sulfuric acid: This acid is essential for creating the anodizing solution. You can find it in many drain cleaners, but ensure it’s pure sulfuric acid without added chemicals.
- Distilled water: This ensures that no minerals or impurities interfere with the process.
- Dye (optional): Anodizing lets you add color to the metal, but you’ll need a special dye that can bond with the anodized layer. Anodizing dyes work best, though fabric dye can also work for certain colors.
- Plastic container: Use a container large enough to fit your aluminum part. Choose plastic, as it won’t react with the acid or power source.
- Protective gear: Wear gloves, safety goggles, and a protective apron. You’ll be working with acid and electricity, so safety is crucial!
Clean the Metal Thoroughly
Start by cleaning the aluminum well. Any dirt, oil, or residue can disrupt the anodizing process. Use a degreaser or scrub the part in warm, soapy water. Even a fingerprint can interfere with the anodizing, so be thorough. Once cleaned, rinse the aluminum with distilled water to remove any traces of soap or degreaser. This removes any leftover cleaning agents and leaves you with a clean surface. Tap water contains minerals that could affect the anodizing, so stick to distilled water only.
Set Up the Acid Bath
Setting up the acid bath is one of the most critical steps. Here’s how to do it safely:
- Pour the distilled water into the container: Fill it halfway or enough to submerge your aluminum part.
- Slowly add sulfuric acid: Carefully pour sulfuric acid into the water, aiming for a solution that’s around 10-15% acid. Always pour acid into water, not water into acid, to avoid dangerous splashes.
- Stir carefully: Gently mix the solution with a plastic or glass rod to ensure it’s well-blended. Avoid splashing, and make sure you’re in a well-ventilated space.
Acid fumes can be harmful, so work in an open area or near a window if possible. To protect yourself, wear gloves, goggles, and an apron.
Connect the Power Source
Connect the positive lead of the battery or charger to the aluminum you’re anodizing. This lead gives it the electric charge needed to create the oxide layer. Then, place a second piece of aluminum or lead in the bath and attach the negative lead to it. This will act as the cathode, completing the circuit. Above all, ensure the metals don’t touch. If the two metals make contact, it’ll short the circuit, stopping the anodizing process. So, keep a few inches between them in the bath.
Start the Anodizing Process
Turn on the power source to start the anodizing process. Bubbles will begin forming around the metal, indicating that it’s working. The longer you let it anodize, the thicker and tougher the oxide layer will become. A good rule of thumb is about 30 minutes for a thin layer and up to an hour for a stronger, thicker layer. Thicker layers take longer and give better durability. Check on it occasionally to make sure everything is stable. If the bubbling stops or the metals touch, turn off the power, adjust, and start again.
Rinse and Dye (Optional)
When the anodizing time is up, carefully remove the aluminum part and rinse it with distilled water. If you’re adding color, dip the metal into a dye bath while it’s still wet. The pores created by anodizing will absorb the dye, giving it a vibrant color. Soak it in the dye for 10-15 minutes for a good finish.
Seal the Metal
Sealing is the final touch that locks in your hard work. To lock in the anodized finish, boil the metal in distilled water for 15-30 minutes to ensure a good seal. Boiling closes up the pores created during anodizing, making the color and oxide layer more resistant to scratches and corrosion. Afterward, remove the part from the water and allow it to dry. It should now have a tougher, more vibrant finish ready for use.
Can All the Metal Be Anodized?
Not all metals can be anodized. Anodizing works best with certain metals, especially aluminum because it reacts with oxygen to form a protective oxide layer. Metals like aluminum and titanium are the most common choices for anodizing since they naturally create a tough, corrosion-resistant surface when exposed to this process. On the other hand, metals like steel, iron, and copper aren’t suitable for anodizing because they don’t develop a stable oxide layer in the same way.
Here’s a breakdown of how different metals respond to anodizing:
Aluminum – Ideal for Anodizing
Aluminum is hands-down the best metal for anodizing, and most anodizing is done with aluminum alloys. Why? Aluminum reacts readily with oxygen to form a layer of aluminum oxide on its surface. This oxide layer is protective and allows dyes to adhere well, giving it a colorful, durable finish.
Titanium – Another Great Option
Titanium is another metal that takes well to anodizing, though it’s less common due to its cost. Anodizing titanium can produce unique, bright colors that change depending on the voltage used in the process.
Magnesium – Possible but Less Common
Magnesium can be anodized, though it’s a bit more challenging to work with than aluminum or titanium. The anodizing process requires careful control because magnesium is more reactive and less stable.
Other Metals (Steel, Copper, Brass) – Not Suitable for Anodizing
Steel and Iron don’t anodize well because they don’t form a stable oxide layer. When exposed to oxygen, they develop rust rather than a protective surface. Instead, other coatings like plating or powder coating are typically used for these metals. Copper reacts with oxygen, forming a patina (a greenish layer) rather than a protective oxide coating. This layer isn’t durable or consistent, so anodizing isn’t effective on copper or copper-based alloys like brass.
Conclusion
Anodizing metal at home is a great way to enhance the durability and appearance of your metal objects. With anodizing, metals, especially aluminum, get a strong, corrosion-resistant layer that holds color well. This protective coating doesn’t just boost appearance; it makes the metal tougher against wear and tear. The anodizing process is straightforward, but it’s crucial to follow each step carefully. While not all metals are suitable for this treatment, aluminum stands out due to its ability to form a tough, corrosion-resistant oxide layer.
At Zintilon, we specialize in transforming ordinary pieces into quality, durable components with professional precision. Our team is here to ensure you get exceptional results that last. Whether you need anodized metal for added strength or style, we have the expertise you can count on. Contact us today to start your project!
Keep an eye for more news & updates on Tech Pro Magazine!


